

Three intelligent irrigation systems, the same trusted LECHUZA quality
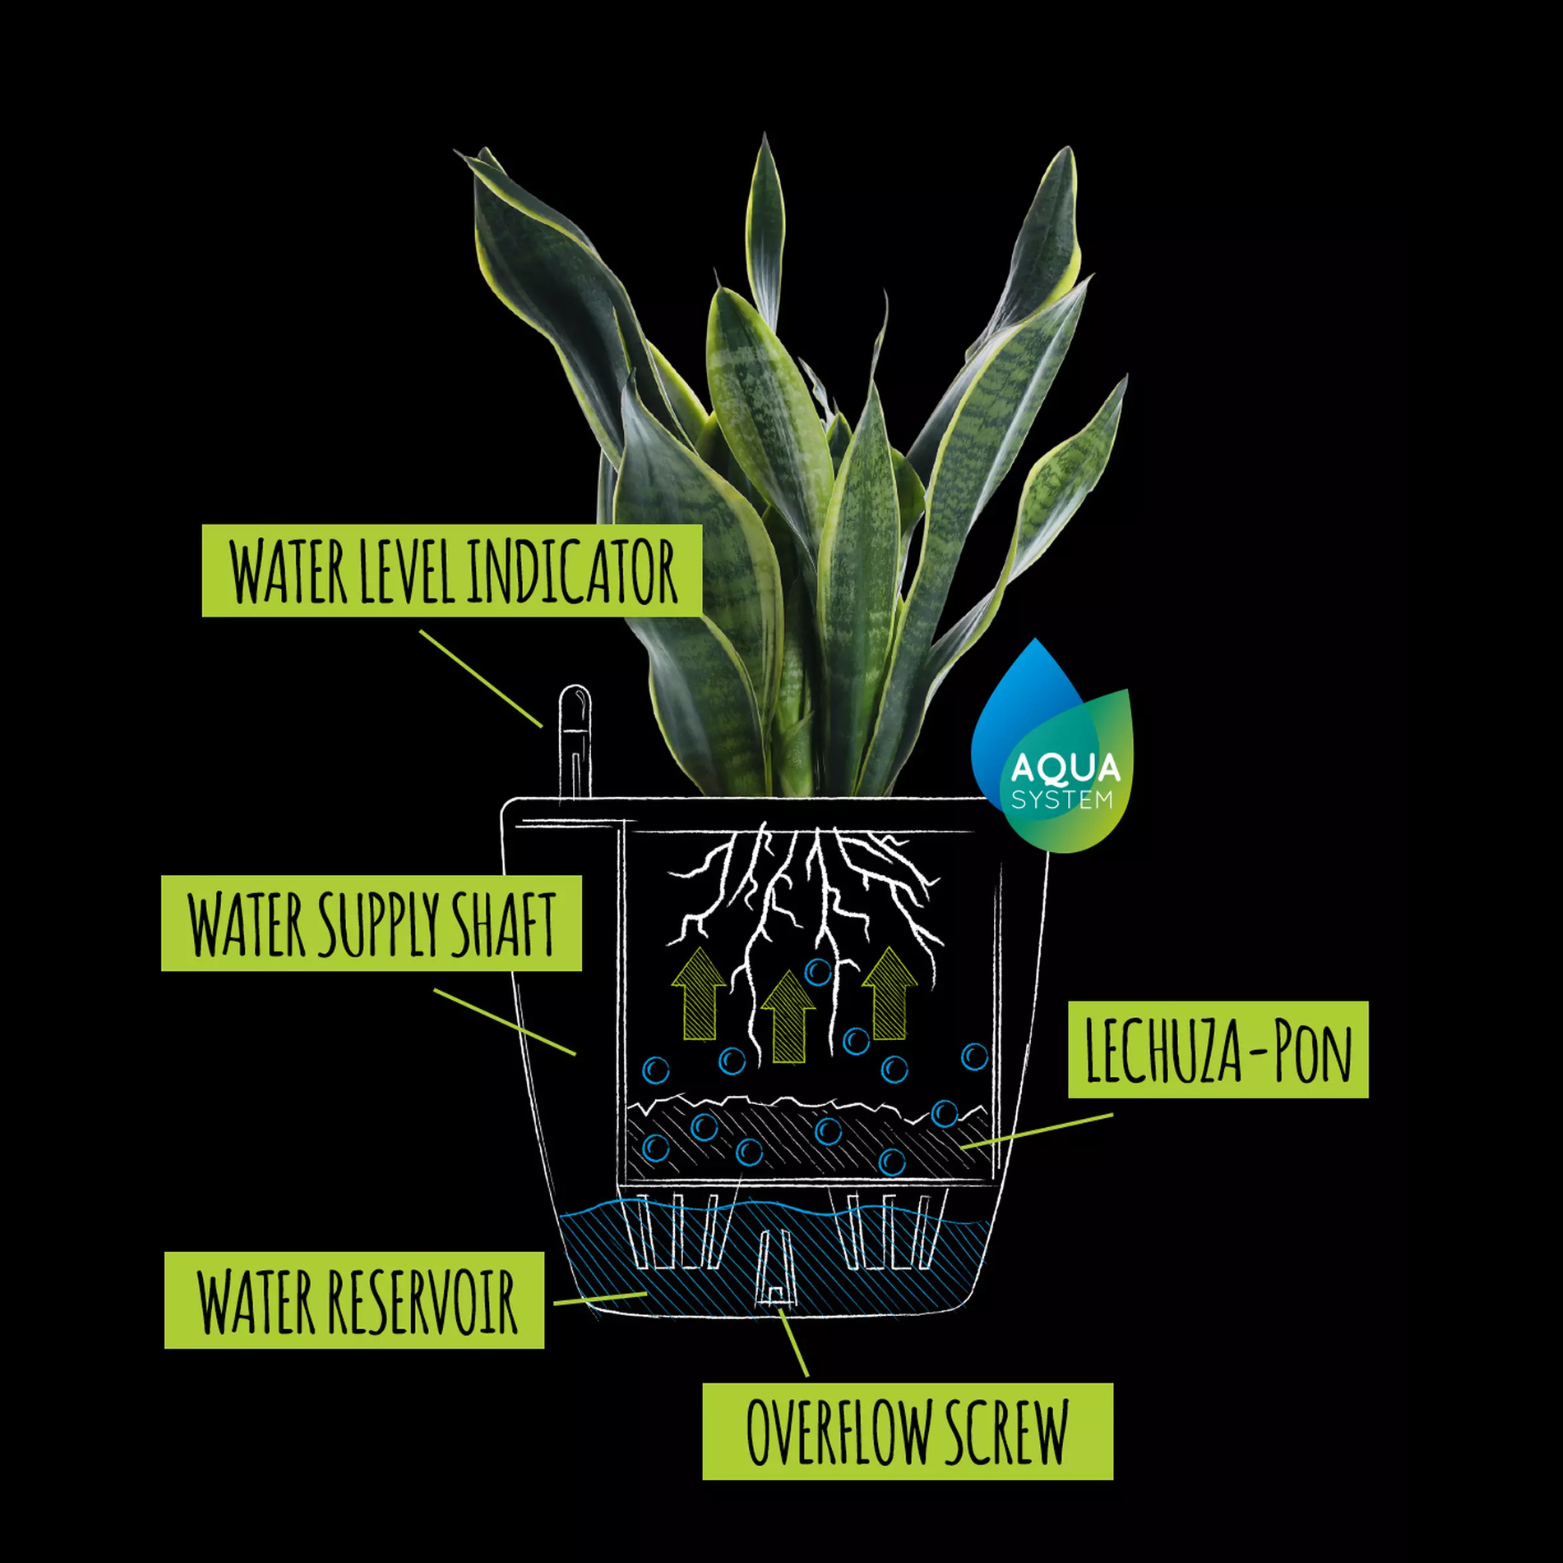
CLASSIC watering system
Instructions for Installing and Using the Classic LECHUZA Irrigation System
Follow these simple steps to ensure your plants receive the right amount of water, keeping them healthy and beautiful with minimal effort.
Installing the Irrigation System
- Insert the irrigation system: Place the watering tube with the water level indicator into the designated hole inside the planter liner.
- Adjust the separator: Position the separator at the bottom of the liner to create the water reservoir. Ensure it fits correctly.
- Fill the planter with LECHUZA-PON substrate: Cover the separator with a layer of LECHUZA-PON, the ideal substrate for the irrigation system. Then, add the substrate or soil of your choice and plant your greenery.
- Place the liner into the planter: Ensure it fits securely.
Using the Classic Irrigation System
- Initial top watering: During the first few weeks, water the plants directly onto the soil so the roots can develop and reach the water reservoir.
- Using the irrigation system: Once the roots have grown (approximately after 3-4 weeks for small planters and up to 12 weeks for very large ones), water directly through the watering tube. Fill the reservoir until the water level indicator shows "MAX."
- Monitor the water level indicator: Check the indicator regularly. Refill the reservoir only when the level shows "MIN" and wait a few days before adding more water, allowing the roots to absorb the remaining moisture.
Additional Tips:
- Always use LECHUZA-PON substrate to ensure the optimal performance of the irrigation system.
- Reduce the frequency of watering during winter or periods of slow growth.
With LECHUZA's classic irrigation system, taking care of your plants is easier than ever!
Still have questions? Watch the following video:
Video

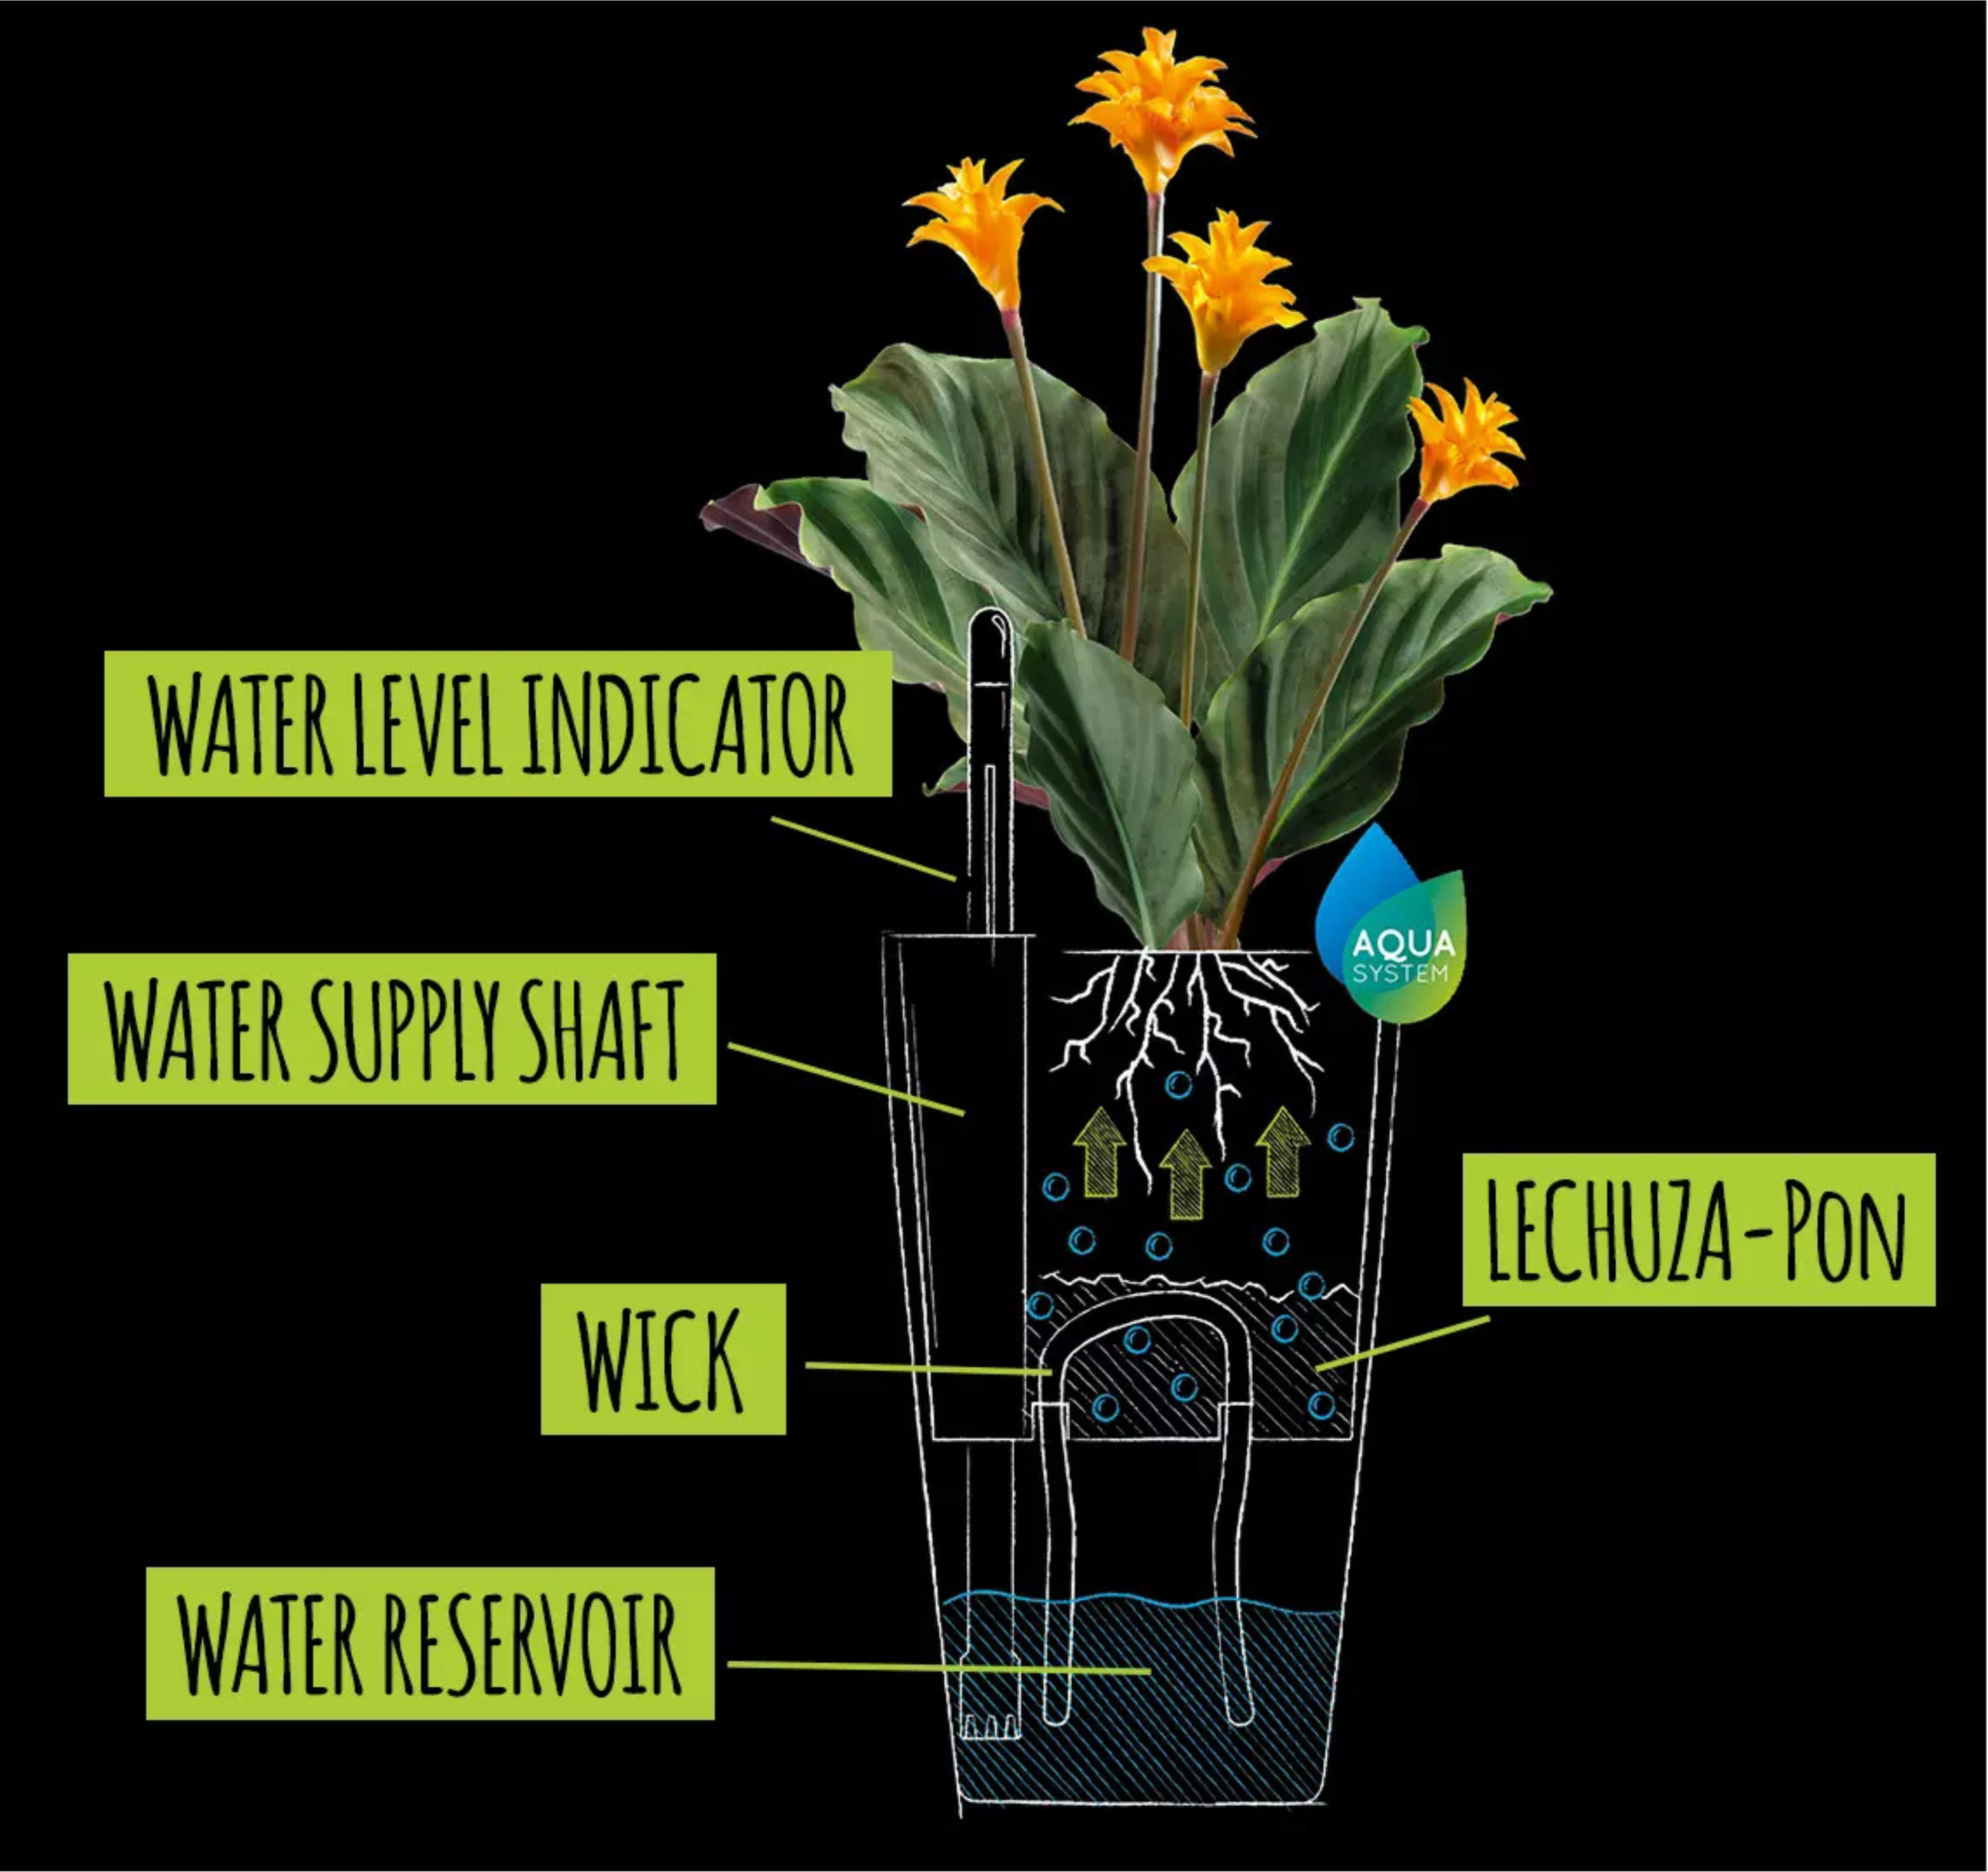
WICK watering system
Wick Irrigation System Instructions
Ensure optimal and effortless watering for your plants by following these simple steps:
Installing the Wick Irrigation System
- Insert the wick
- Prepare the planter
- Place the insert into the outer planter
Watering with the Wick System
- Initial watering
- Using the irrigation system
- Monitor the water level
Additional Tips
- For optimal performance, use LECHUZA-PON, as it improves water distribution and root aeration.
- Reduce watering frequency in winter or during periods of slow plant growth.
With the LECHUZA Wick Irrigation System, keeping your plants healthy is easier than ever!
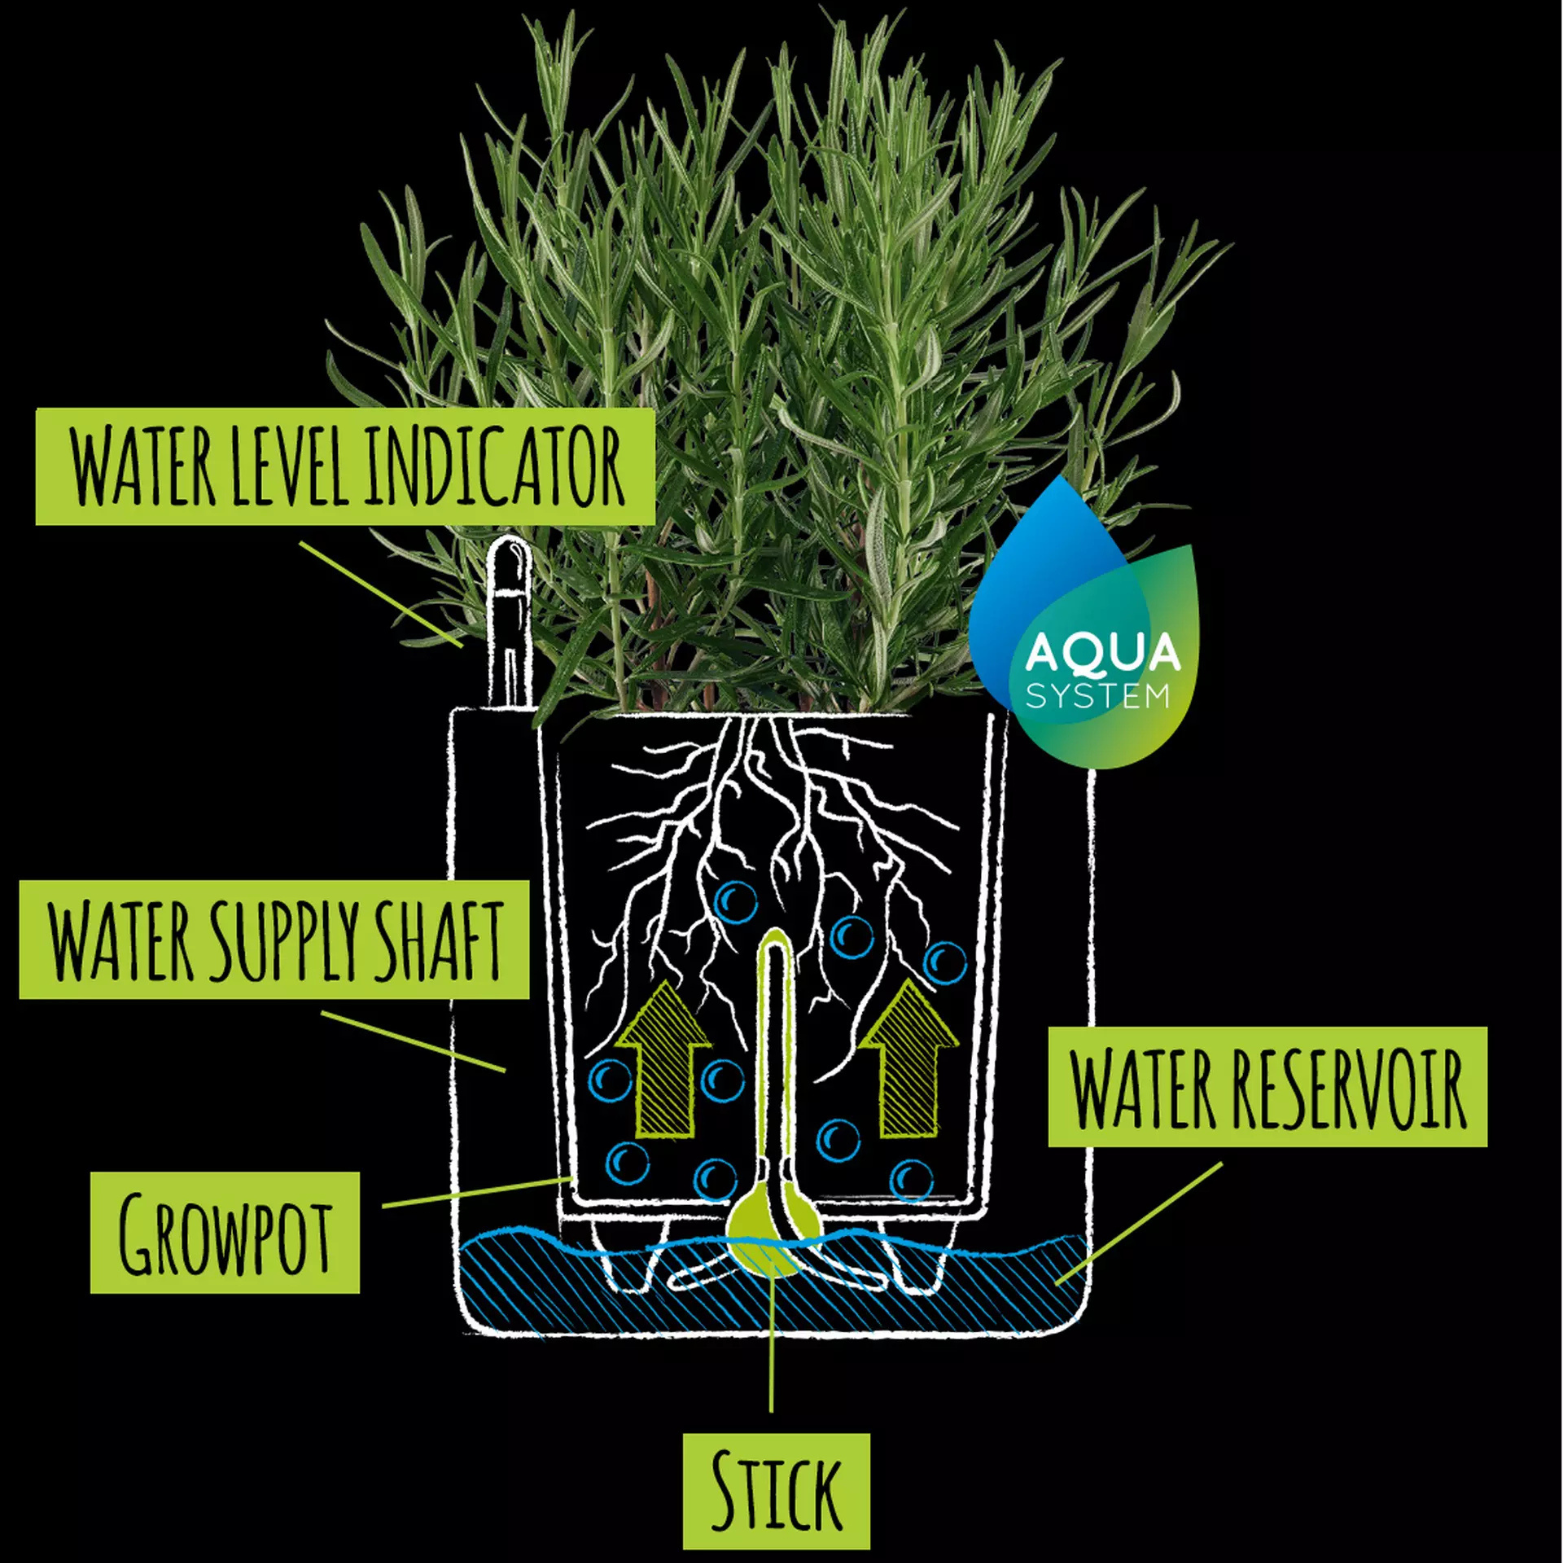
STICK watering system
Instructions for the Stick Irrigation System
No repotting needed!
Quick and hassle-free: thanks to the stick system, you can easily place small plants into the planter liner without removing them from their grow pot.
How to Set Up the Stick Irrigation System
- Prepare the grow pot and the stick
- Insert the stick
- Place the grow pot into the liner
- Water and enjoy
Additional Tips
- Make sure the stick is properly inserted to ensure optimal water supply.
- Check the water level regularly and refill the reservoir as needed.
- Reduce watering frequency in winter or during slow growth periods.
With the LECHUZA stick irrigation system, keeping your plants healthy has never been easier!